Tuesday, February 28, 2012

VINTAGE SAAB CLOCK REPAIR

Below are two examples of what some of the VDO clocks I receive for reconditioning look like when I get them. Makes me wonder how long they were under water! YUK!

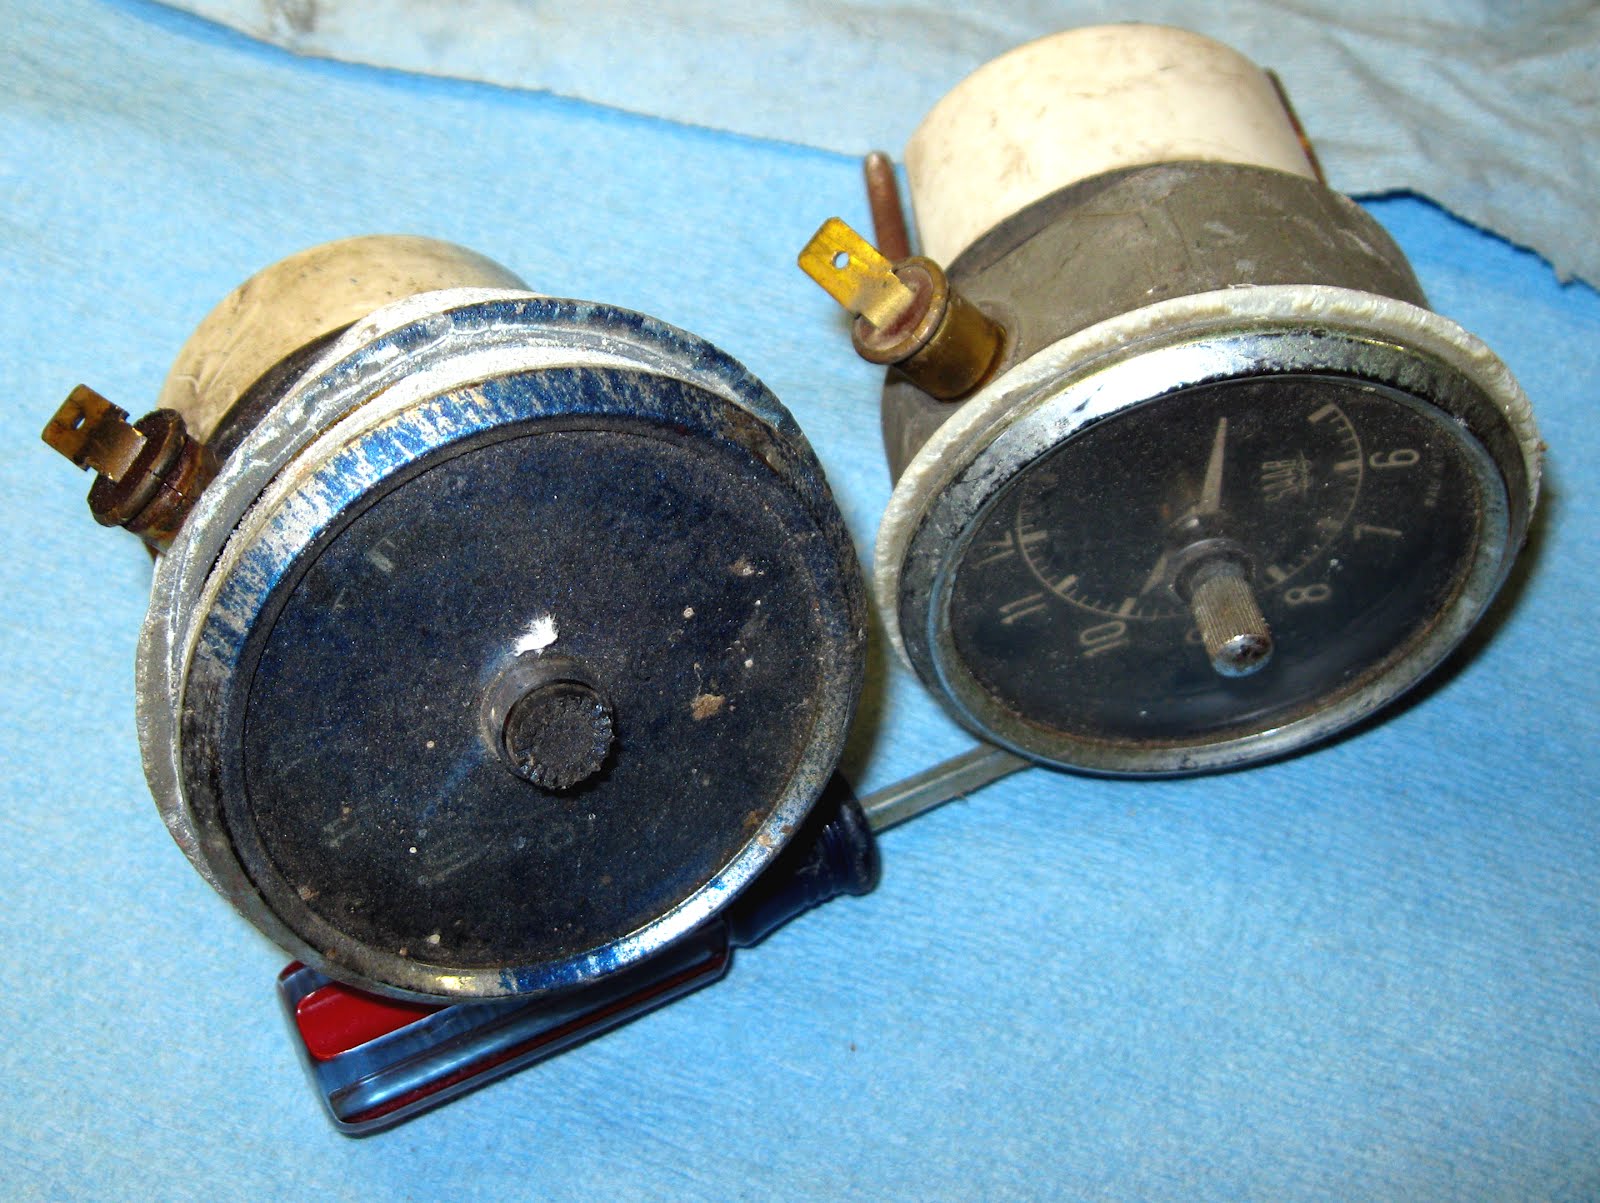
The clock on the left actually had PAINT all over it, the one on the right, just a lot of CRUD. I was able to save BOTH little tickers and get them ready to tick merrily along once again.

HA! An ASSEMBLY LINE of wee clocks. These have been through the ultrasonic cleaner, using high priced chemical clock and watch cleaner, then an ultrasonic rinse, using high priced chemical rinse. They have all been lubricated with watch oil, using some surprisingly expensive oil applicator probes. The oiling process has to be done under strong magnification because the parts of the tick-tock portion of the clock are VERY SMALL.

This shows the parts of a VDO clock. From left to right---the chrome ring, a retainer ring and the plastic "glass" with the time changing knob. Next the two hands of the clock, then the clock face. The main housing or can, with the illumination light holder is the lump in the center. Almost invisible in this view is the actual tick-tock clock mechanism, which is bolted to the back of the housing. Next is the auto rewind mechanism. The white plastic part is the cover over both the clock and rewind mechanisms. Th U shaped piece is the clock retainer that holds the clock in place in the instrument panel, along with the two securing knobs. Below all that is the in-line fuse assembly that I add to all my reconditioned clocks to protect them, since most have the [blown] fusible link soldered back together with high temperature solder.

Believe it or not, This is the wee clock that was shown on the left in the first picture. It wasn't easy bringing this one back to life! It usually takes me about a week to recondition your clock and get it sent back to you. It's good to hear these little clocks ticking merrily away in a vintage Saab. E-mail me at jacksonashcraft@gmail.com for information.

Tuesday, February 21, 2012

SAAB WIPER MOTOR 3RD SERIES

The third series of Lucas wiper motors used by Saab for the 95V4 wagon and 96V4 sedan was an interesting combination of several Lucas units. I always make extensive rough drawings of ANY mechanical part I take apart, like the rough of this motor, shown below. That way, after the parts are all cleaned, reconditioned, painted, etc, and scattered all about, I know how it all goes back together again, with no guesswork.

While Lucas wiper motors are all similar, there are important differences. The drum wheel [lower left in the drawing] is different from one style motor to the next, as are mounts and self-park switches. Incidentally, the drawing is one of FIVE I made to further detail this Lucas motor.

This is the disassembled motor. You can see why the rough drawings are important. I have already cleaned the grunge off the outer "can" and the main mount [top, center]. I have also cleaned out 30 years or so of nasty, mostly hardened grease off the gear case and drum gear [center left]. The badly worn brush plate and wire assembly is at bottom right.

AH! NICE LIKE NEW DEPT: The armature [left] has been thoroughly cleaned and the commutator [the brass "thingie" at the center of the armature] lightly turned. The main gear case has the new brush plate assembly installed. Time for lubrication [with modern, temperature stable, non-hardening lubes] and final adjustment and assembly.

Here is the finished, assembled motor ready to go to the owner. I showed you my test bed for wiper motors in an earlier blog and this motor passed the bench test with flying colors. No reason this motor won't give years and years of reliable service.

V4 SAAB TRANSMISSION SURVIVAL GUIDE

This is a really good book that tells you everything associated with the transmission in your V4--and for that matter, 2-stroke Saab, how to maintain it all, and how to replace parts when that is necessary.

Like all my books, I wrote it for the owner/wrench, to take away a lot of the mystery about all that stuff jammed way in the back of the engine bay. The exploded view drawing below shows just a few of the bits that are covered in detail in the book. You'll see how to change the clutch and pressure plate, the transmission seals, the rear transmission mount and how to rebuild the clutch release arm and much, much more.


I show you in nitty-gritty detail how to change the axle boot seals, and in the process, show you how the assemblies go together, what lubricants to use, what adjustments to make and many of the tools you need to do a lot of this work. The drawing below shows the inner axle driver [on the right], the axle shaft [on the left] and the universal cups on the "T" driver [center]. This drawing is typical of the dozens of drawings you'll find in the book. Specifications and dimensions are included where that will be of some help to you when you are skinning your knuckles on this stuff.

I show you the shifting mechanisms of each of the cars. The drawing below is for the shift "tower" used in Sonett III cars, which I describe in some detail, including how to change its bushings when that is needed, and how to modify the tower to help preserve the transmission itself. I even show you what you have to do to change over a column shift Sonett V4 to the floor shift Sonett III mechanism.

This is not an overhaul manual for the transmission itself. You are NOT going to do that anyhow, unless you have the factory transmission manual, the factory press, a couple dozen very special factory tools and a good bit of experience doing this work. The book IS an excellent guide about repair and maintenance of everything associated with the transmission, and I include a lot of information about how to extend the life of the 'box in your Saab. If you are interested in this--or any of my books--contact me at jacksonashcraft@gmail.com. Keep On Saabin!

Wednesday, February 15, 2012

EARLY WINDSHIELD WIPER MOTOR REBUILD

This is what the average 52 year-old Lucas wiper motor looks like, taken apart. Actually the main case [top, left] and the mount [center, top] have already been cleaned up, ready for paint. This sucker was STIFF and actually had to be carefully pressed apart. 52 years in a crusty old Saab will do that to you, I reckon....

The build date was "02-66", so I wasn't surprised to have to dig the old, dead grease out of the gears with dentist's torture tools. The armature [bottom center] was burned and I carefully turned it just a bit on my lathe. After that it was just a ton of clean-up, brush and spring replacement, greasing [with modern temperature-stable, non-hardening lubricants], and reassembly.

Above is the wiring diagram for this motor in a '68 Sonett V4. The schematic for the same motor in the same year Saab 95/96 is almost identical.

Here is the 52 year old motor, cleaned, reassembled, adjusted, tested, painted and ready to go to work for another 50+ years. Good stuff, Olaf!

Saturday, February 11, 2012

MAINTENANCE & OVERHAUL OF THE V4 ENGINE

My How-To book on the V4 engine was written for the owner-wrench. I take you by your little finger and walk you through the process of rebuilding one of these little engines. All the factory spec's are there as well as a LOT of information that was NEVER in any shop manual. I cover special tools, some of which you can build, cooling systems, carburetion, exhaust systems and much more.

I went to the trouble to make a TON of clear drawings to show you exactly what's going on inside the little Ford engine. including a sequence of drawings that show you exactly how to do a valve adjustment correctly. "Oh that's easy!" somebody says. OK, smart guy. point out where the number three exhaust valve is located in the drawing below. If you aren't sure, you need the book.

The drawing above, like many others in this 96 page book, is accompanied by explanatory text. The book is a good read, even if you don't ever mash a knuckle working on your own engine.

This drawing, from page 37 of the book, shows you every gasket in the engine. Another full page has drawings of every BOLT in the engine, and tells you the size of each bolt and where it goes.
The book is full of this kind of information, which I included, based on my 40+ years experience rebuilding these little buggers, so you could rebuild your engine right--the first time.

Monday, February 6, 2012

VINTAGE SAAB PANEL RHEOSTAT REBUILD

This is a selection of vintage SAAB instrument panel rheostats, which don't look too bad but....they refuse to work.Some refuse to rotate, some only work on full bright, but with most of them, they will rotate but nothing happens.

This drawing shows all the gubbins inside one of these little buggers. HEAT from the resistive coil of wire is the problem. It causes a really nasty build-up of crud on the brass contacts and no amount of squirting ANY commercial cleaner in there will blast off that build-up. I use some REALLY nasty stuff and some special cleaning tools to convince Mr Rheostat to do its thing once more.

This is a typical rheostat once it is dismantled. The resistive spring in this one is shot, which probably means it is a parts donor unit.

Below are three rebuilt rheostats, ready to happily dim the instrument lights in someone's Saab for another 40 or so years.

This photo--and the drawing--show a couple of different knobs. The short knobs are for early cars, the long knob came into use around 1970. I'm sure you will be pleased to know that the rheostat doesn't care what knob it has on it.

Wednesday, February 1, 2012

HIGH PERFORMANCE BOOK

Spring is coming, when every Saab owner wants to get his/her wee Troll out of mothballs [or from under a snowbank], clean it up, and go zinging about the countryside. Some of us want to zing FASTER about the countryside, and my 96-page book tells you how to do it. I have always recommended a balanced approach to performance improvements, and this book tells you what you need to know about building a hotter V4 engine, and also how to improve engine cooling, brakes, suspension, wheels and much, much more.

There are chapters on Weber carburetors--from single barrel to the formidable dual two barrel DCOE side-draft types. I cover anti-roll bars, skid plates, chassis stiffeners, ignition systems, racing oil pans, light flywheels and exhaust systems. The whole book is based on over 40 years of my own experience using these little Saabs in autocross, hillclimb and high speed rally competition.


I even cover turbocharging the V4 engine, which is a quick way to a LOT of power--if you do it right--or a super quick way to LUNCH an engine if you do it wrong.

Below you see yours truly with a 160 horsepower V4 engine, built for installation in a Saab 96, which was run in a Peking to Paris off-road rally. That engine--one of two I built for that race--has the twin, cross-ram intake manifold set, with a 40DCOE twin-choke Weber carburetor on each side. These were awesome looking little engines that produced awesome performance in little Troll cars. The book shows how it was done. This is THE how-to book, if you want to zing FASTER in your V4 powered Saab.