skip to main |
skip to sidebar
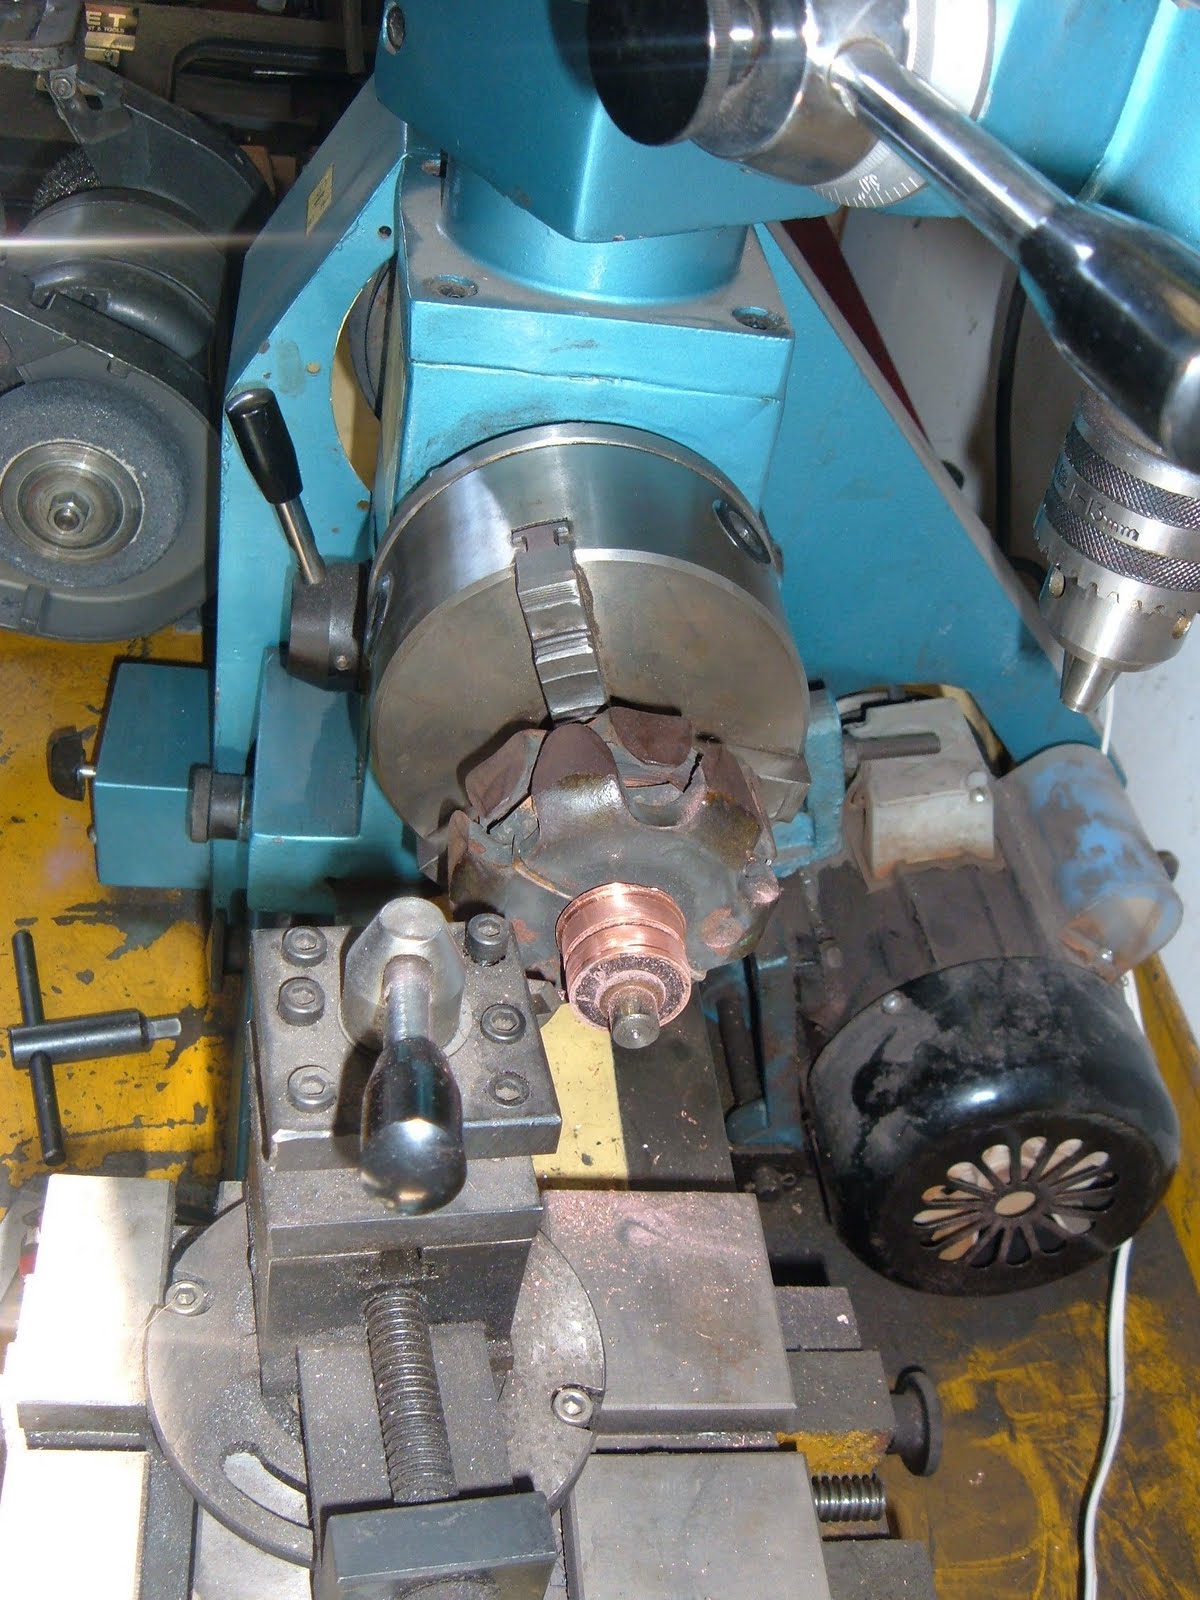
You are looking at the front of another customer's Saab V4 transmission, mounted in my factory transmission press. The gear with the large teeth is the pinion gear. Above and to the left of that gear is a screwed-up input shaft hub. Inside that hub is the freewheel unit. The pulley-looking thing sticking out of the hub is whats called a "dog clutch" gear. Someone with probably good intentions had welded on half washers to hold the dog clutch engaged, rendering the freewheel inoperative, or as we call it,"neutered".  The problem with this neutering method is that it throws the main shaft out of balance, and makes it impossible to ever revert to freewheeling again. This is really not a good way to neuter the freewheel.
 Here is the main shaft after I removed it from the transmission. You can clearly see the dog clutch piece dangling from the freewheel hub of the main shaft. Hmmmm.....what to do to save the expensive main shaft and dog clutch....hmmmm....
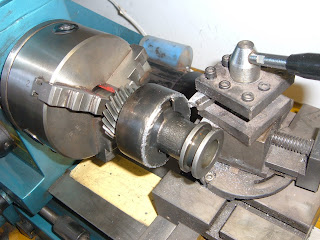 I put the sucker in my lathe and began to cut off the half washers, by cutting through the welds. This is the cutter set-up on the carriage fixture on my lathe. I have made the first cut in this picture.
 This is the second and final lathe set-up. The cut has gone through the welds and is into the half washers. My hope--at this point--was that the welding had not screwed up the freewheel hub. If it had, the mainshaft was junk.
 VOILA! The cut is completed. The owner got lucky. The main shaft, the dog clutch and even the freewheel parts inside the hub were all still good. All I had to do from this point was to use the lathe cutter to clean up the end of the freewheel hub.
The point of this? There is a right way and many wrong ways to do something. This was one of the wrong ways that I managed to correct. I WILL neuter the freewheel, but do it the right way, so nothing is out of balance, and should the owner [or subsequent owner] ever get soft in the head and want to make the freewheel function again, he [or they] can do so.
Bosch distributors, as used in Saabs with V4 engines, get old, tired and sloppy. [I've known some mechanics like that, too...]. Bosch didn't bother to put bushings at the BOTTOM of the distributor body, so over time and a lot of miles, the aluminum distributor body gets "hogged out". When that happens, the ignition point gap varies as the engine runs, the dwell changes, and the basic engine timing changes. And the engine runs like crap. Here is my setup in that pretty blue lathe again, to machine out the bottom of the distributor body so I can install a bushing. I built a precision tool [mounted in the lathe chuck in this photo] to hold the distributor body on its exact center line. The precision lathe bit [shown in the steady chuck at the bottom of the photo] does not move. The chuck in the lathe rotates the distributor body as the steady chuck advances the bit through the body, machining the correct diameter hole as it goes.
 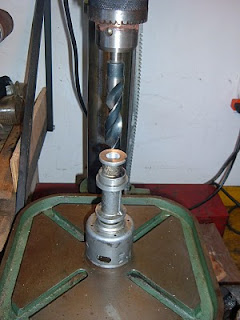 Here I am using a larger bit in my big, commercial drill press to do a light chamfer in the freshly machined hole. This will allow the bushing to start into the distributor body easier.
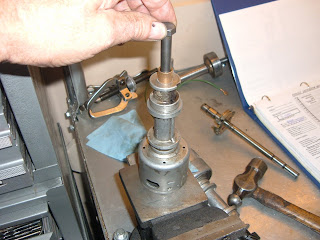 I use a bolt that is machined to JUST slightly smaller than the diameter of the new bushing to guide the bushing into the distributor body. The bolt is long enough to fit through the bushing on the TOP end of the distributor body, so the bolt forms a perfect guide as I press the bushing into place. The bushing is an interference [plus] fit into the distributor body.
 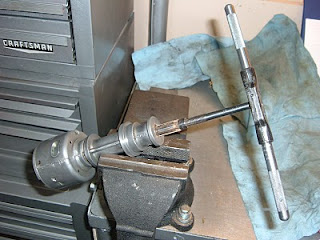 I use an adjustable reamer to open up the bushing to an inside diameter equal to the diameter of the distributor lower shaft, plus 0.003". I always HAND ream, and never attempt to speed up the reaming process as some might by putting the reamer in a hand drill. I ream a little, then test fit the shaft, and repeat the process until it is just right. When I'm finished with one of these Bosch distributors, it doesn't know it isn't young, vibrant and ready to go for thousands of miles once again.
I seem to have accumulated, over the years, a whole lot of drill bits. Well, y'know, you break one or it gets too dull to make a hole, and you throw it in a box and buy a new one. Or some supplier offers you a deal you can't refuse on a whole new SET of drills...and finally you get tired of moving the box of tired drill bits around. Either sharpen 'em or pitch 'em out. Given the price of new bits--especially the larger diameter bits--I decided it was time to call....THE DOCTOR! The DRILL DOCTOR, to be more specific. Behind several dozen drill bits in various boxes, is the DOCTOR, itself. It is the gray machine just to the right of center in the picture. To the right is a drill bit in a special chuck, ready to be sharpened. So--if you'll pardon the pun--here's the drill:
You put the drill to be sharpened in the special chuck, loosely. Then you insert both into the opening on the Doc. The one toward the left end of the little machine. You use the special fixture in there to orient the drill in the chuck correctly. Then you tighten the chuck, lightly, take it out of the Doc and finish tightening it. Next it goes in the opening on the right end of the little machine. You turn on the switch and rotate the chuck clockwise, with a gentle pressure on the chuck. The machine operates the bit on a cam and cuts the bit at the correct angle AND on a bevel that puts the cutting edge of each side of the bit higher than the heel, or back side of the bit.
The bloody bits come out BEAUTIFUL! I did all different sizes, from 3/32" up to 1/2" and Mr Doc didn't screw up ANY of 'em. I got into it and before I knew it, 2 hours had passed and I'd sharpened 67 old bits. JEEZ! I can drill the hell out of stuff now--HA!
I WISH this were a paid testimonial for DRILL DOCTOR....but, sadly, it ain't. But I can tell you one thing---I saved enough dough in that two hours [in the price of new drill bits] to pay for the little Doc a couple of times over. The little sucker really works!
You are looking at the CHUCK end of my lathe. The piece in the lathe is the stator from a customer's alternator. The brass colored thingies are called "slip rings". The brushes in the alternator rub continuously against these slip rings and after about a jillion miles, wear grooves in the slip rings. Using this lathe set-up, I carefully cut the slip rings to a smooth surface without the grooves.
This doesn't have a darn thing to do with exhaust systems or donuts, but the lathe is a pretty color, yes? Well....
 The deal with a lathe is to make a number of VERY light cuts. Getting heavy handed here can gouge [and ruin] the slip ring. That makes junk out of the whole alternator stator. Not good. A lathe is a great tool, when you know how to use it correctly.
 NOW we can talk about exhaust systems and "donuts". On a Saab/Ford V4 engine, the donut fits against the exhaust manifold gasket. I open up the exhaust PORTS to gasket size, so the donut has to be opened up to an inside diameter just a wee bit larger than the gasket. This is the lathe set-up, showing the donut mounted in a special holding tool that I built. Once again, I make a number of light cuts until I get the inside diameter that I want. You can see a previously cut donut laying on the lathe platform [yellow painted area], right behind the lathe carriage.
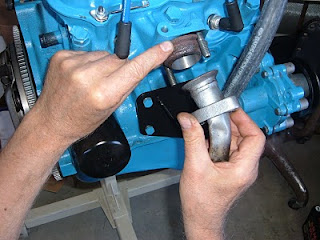 You are looking at the RIGHT side of a freshly rebuilt, high performance Saab V4 engine. I'm holding the opened-up donut in my left hand, and the end of an exhaust header pipe and pipe securing flange in my right. You can see that the dount is actually larger--by quite a bit--than the header pipe. This engine will get larger diameter header pipes, part of a big bore high performance exhaust system.