Showing posts with label Saab. Show all posts

Thursday, May 5, 2016

SAAB MONTE CARLO INSTRUMENT RECONDITIONING, PLUS

 This is the flip side of a Saab Monte Carlo instrument module, in all its beat up glory. Rust, corrosion, hard handling, and 50 years time have taken their toll.   AK!
 Here is the front of the plastic instrument mounting panel. It was pretty boogered up. You can't see all the cracks and gouges in the panel, in this photo, but they were there.
 The panel had six mounting bolts cast into it--this is the back side--and five of them were ripped out. The panel was also warped and was cracked in about a dozen places. 
 J B Kwikweld to the rescue! A local hardware store was the source for the 4mm x .7mm bolts, as well as the brass pipe I used to provide the centering sleeves for each of the bolts. There were a number of places where I used the JB to straighten the panel by routing out a long groove, laying in the JB, then holding the panel flat as that brand of killer epoxy cured for 24 hours. 
 The front of the panel had eight or ten places where there were a lot of little side by side cracks.  I ground out each tiny crack with a Dremmel tool, then filled it in with auto body filler and sanded it smooth. This sand-fill-sand-fill-sand process went on for a couple of days.... Then it was time to prime-sand-prime for a while, and finally give it three coats of color.  Pretty good, huh?
 Each of the instruments were reconditioned. Here is the full set, ready to install in the car.
And here are the four major instruments sitting in the repaired and repainted mounting panel. All the warning lights--not shown in this photo--were also reconditioned--they were just as grubby as the rest of the module [see photo one--above].  The owner could have just whacked out a panel out of aluminum and screwed it to the instrument panel of his Saab 96, but chose to have me do the job right...and you can see the results. Reminds me of a sign I saw one time on the shop of an old time welder/blacksmith:  "I can mend anything but a broken heart."

Thursday, March 3, 2016

SAAB SPEEDOMETER--DUAL REGISTER INTO A STANDARD 2-STROKE

 What we have here is a HYBRID speedometer.  My customer wanted a dual register speedometer--as in a Monte Carlo--for use in his standard 1966 96 two stroke car. The trouble was that the Monte Carlo cars--either two-stroke or V4--had a transmission with a 4.88:1 final drive transmission.  The '66 two-stroke had a transmission with a 5.43:1 final drive. So the MC speedometer would be WAY WRONG in both SPEED and MILEAGE recording......Hmmmmm.....
 Clearly, the solution was to change the internal gearing of the MC speedometer [see first photo]. After some head-scratching, I did that gearing change, and the finished speedometer [above] reads correctly on the test bed, for a Saab with 5.43:1 gears.
Here is the flip side of the finished speedometer. I set the odometer miles to match the miles currently shown on the speedometer in the customer's car. The change-over can be done, but it is nice to prove that the change was done correctly, by running the finished speedometer on the test bed.   Good stuff!

Tuesday, November 10, 2015

SAAB 95/96/97 TRANSMISSION OIL DIP STICKS

 Mass production time again--Saab 95/96/97 transmission oil dip sticks this time. The red "thingie" in the foreground is the jig I built that I use to get the correct bends and "fit" for the dip stick. The dip stick in the jig is an ORIGINAL Saab item. The eight new dipsticks [above] are ready for customers, tho the last three need to have their handles painted green.
Another view of the eight finished dip sticks.  See...having a transmission oil dipstick just might mean you would actually CHECK THE OIL LEVEL in your transmission. Just remove the fill plug near the top of the gearbox, wiggle the dip stick down into it until the bent "stop" sets against the sides of the open hole, pull out the dipstick and read it. There are notches for MIN and MAX on the dipstick--just like the original--so you can tell the oil level in the unit.
You don't have to get greasy trying to take out the stupid check plug on the side of the transmission, and you don't have transmission oil dripping on your garage floor.   AND...the transmission you save--from lack of oil--just might be YOURS!

Sunday, October 18, 2015

SAAB 95 & 96 WIPER MOTORS WIPE AGAIN!

 Wiper motors again! This ugly duckling is a Lucas motor for a late SAAB 95 or 96. This one was in its fairly ugly, not working, state when I received it.   Nasty....
 Here is the same motor...DE-nastified, and ready to be reassembled and tested.
 Ah, Henry Ford would be proud of me....three of 'em reconditioned and ready for reassembly.
...and here they are, ready to do their duty happily in a vintage SAAB 95 or 96.  All have been tested for both speeds, plus self park.  Neat, aye?

Sunday, June 7, 2015

SAAB V4 DISTRIBUTOR RECONDITIONING

 Mass production time again! Here are six [of eight] Bosch distributors for Saab V4 cars, completely disassembled, and with a zillion miles worth of grease and crud cleaned off. They are ready to have the bottom of the distributor housing rebushed. The housing "hogs out" at the bottom, with age and a jillion miles of useage. This wear causes the point gap [thus the dwell and the ignition timing] to fluctuate and the engine runs like crap. Note that the second housing from the right already has a steel bushing installed.
 I use a bronze bushing...BUT...first the distributor housing must be reamed to a certain diameter.  It is essential that the distributor be held perfectly square and the tool that I made [which is in the lathe chuck in this picture] does that job. You can see that several distributors have been drilled, thus the pile of aluminum FUZZ on the lathe bed.
 You can see the bronze bushing set in place, just ready to be pressed into the distributor housing.
 Once I get the bushing in place, I have to ream it to the shaft size, plus 0.003". This is a tedious process, but doing the job with a hand reamer makes sure I get the correct fit. Every distributor is a LITTLE DIFFERENT and has different amounts of wear--remember--these suckers are about 50 years old! 
 You can see the five distributor bodies with bronze bushings and the one with the previously installed steel bushing here.  All the shafts have been fitted and they are ready to go back together again. Now the REAL work starts, as the points advance plates must be fitted and adjusted, a vacuum control unit fitted, and then the assembled unit has to go onto the SUN distributor test machine to set the advance curves.  This usually means I get to take the suckers apart 2 or 3 times to adjust the mechanical advance gubbins to get the correct advance curve.  Swearing usually helps. Quite a lot of swearing helps quite a lot more. 
All eight completely reconditioned distributors are shown here. These all have points and a condenser installed. If the customer wants a Pertronix unit, I take out the points and condenser and install the P unit. Then I add a rotor, a cap and a new set of spark plug wires, and the bugger is ready to go into the customer's V4 engine, for another 100,000 miles.  Good stuff!  

Friday, April 24, 2015

SAAB RIBBON SPEEDO MODULE--ELECTRIC TEMP GAUGE

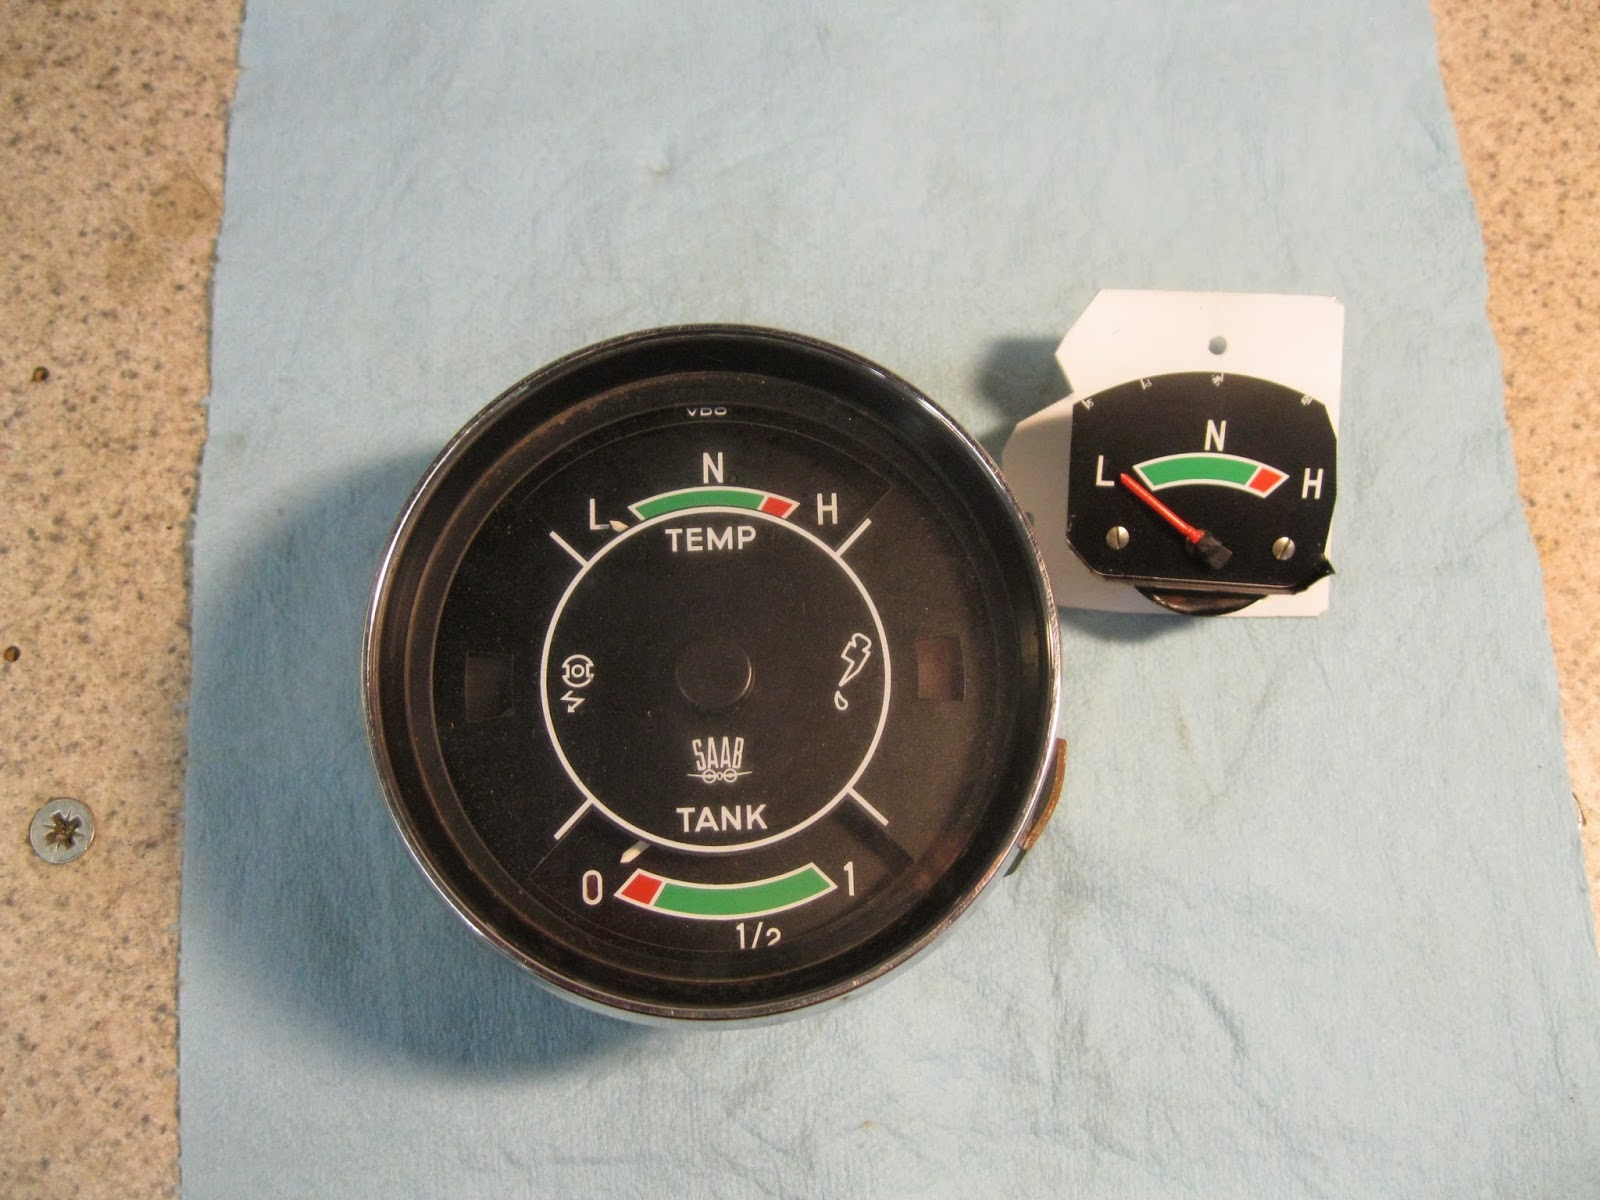
 Here we have two ancient Saab 96 speedometer/multi-gauge units. Because the temperature gauge [left gauge in top module] is a so called "bulb" type, the capillary tube from the sender in the cylinder head to the gauge itself gets damaged and the gauge is kaput. NO new assemblies are available. The SOLUTION is to change to an electric gauge/sender unit combination.  The PROBLEM is figuring out how to mount an electric gauge in the old module. Head scratching time....
 My solution is to remove an electric temperature gauge from a Saab combination gauge unit. I trimmed the gauge face slightly and mounted it on an aluminum plate, as shown above. Making the gauge fit the mount plate and the mount plate fit the speedo module....let's just say that part took the most head scratching.  

Once you get one of these suckers apart, you have quite a few pieces. I've cleaned them all up here, and have repaired the inoperative odometer in this one, and it's ready to go back together. That's another the tricky part, as you might imagine...

 I always have to strip the main, cast aluminum case because it was painted white at the factory and the old white paint flakes off. You can see it is all cleaned and repainted here, and the mechanical bits are all lubricated correctly and yes, the odometer now works!

Go back to the first photo [bottom] to see how the electric gauge looks when it is installed. It is a good "fit" and a good "match" for the other original gauges. This photo shows the back of the module, with the electric gauge mounted. The tan wire is marked "tank", but that's my mistake--I changed it to correctly read "temp sender".
All electric gauges--except an ammeter and a voltmeter--need 3 electrical inputs: 12 volts for reference, an input from the sender unit, and ground. The latter is the black wire in the photo.  So you see, the head scratching worked! 

Thursday, January 15, 2015

CLOCKS THAT GO "TICK" IN THE NIGHT

 A world of square body VDO auto rewind clocks!  I have to play the percentages on old clocks, so I usually do four of the buggers at a time. Here they are---all apart, but completely cleaned, oiled and ready for reassembly. At the extreme left center is an auto rewind unit. Below the three outer bodies [silver color] are three clock mechanisms [brass color]. Below them are the white plastic back covers.  Whole LOT of pieces!
 The red object is one of about 100 special tools I've built to use in the reconditioning of clocks, speedometers, wiper motors, etc.  This one is a multi-use HOLDER. The arm of the tool [on the right] fits into my vise, to hold the clock steady while I work on it.
AHA! Four of the buggers reassembled and ready to go. I test them for function and time--on my test bed--before I put the plastic "glass" and the chrome outer ring back on. Remember, these clocks are getting close to being 45 years old, so they "enjoy' a failure rate of about 25%.  Old age takes it's toll.  These are four that "made it."  
The red gizmos behind three of the clocks are in-line fuses. I have to re-solder an internal fusible link, and the 3 amp inline fuse protects the coil that actually makes the reset link arm go "ka-KLIK!" and resets the clock so it keeps on ticking. 

Saturday, November 8, 2014

SLIME IN A SAAB V4 TRANSMISSION

 I have reconditioned a TON of Saab 95/96/97 transmissions over the years--this one is number 519--and have seen a lot of different combinations of CRAP oils that owners or mechanics have put in them.  This one was new to me and was probably the nastiest GLOP I have ever found. It was about 1/8" thick and was total SLIME, and completely unidentifiable in nature. It looks like RUST but none of the trans parts were rusty. It WAS sticky, so I suspect SOME of the YUK was STP, which is a complete NO NO for these units. 
 The GOO was all throughout the transmission--thick, ugly, yet more or less pliable, sort of like molasses at zero degrees F. I completely dismantled the transmission and sent the case and covers to my machine shop to be run through the hot tank. No way was I going to spend 2 or 3 hours trying to clean the CRAP out! Clearly the last owner had no clue about what transmission gear oil to use in a Saab transmission.
 There is a VERY good reason to use the correct gear oil[s] in a Saab transmission. The exploded view above shows a section of the gears, bearings, etc that fit on the MAIN SHAFT of the Saab 95/96/97 transmission. There are four needle bearings on this shaft--see numbers 30 in the drawing. The numbers 31 indicate a slightly different size needle bearing used inside 4th gear [No. 33] on later transmissions. Gear oils heavier than SAE 75 GL5 or SAE 80 GL5 simply will NOT lubricate these needle bearings. Similarly you must NEVER use a HYPOID differential grease which is available in SAE 90 or SAE 140 viscosity, for the same reason.
 Above is a typical differential assembly. Items numbered 6 and 11 are the heavy duty differential carrier bearings. Items 16 and 20 are the pinon shaft bearings. These are large and open, so it is easy for the heavier greases to keep them lubricated. It should be plain to you that this is not the case with the needle bearings in the Saab transmissions.  DO use the correct gear oils. I have used AMSOIL synthetic gear oils for 40 years or so and have never had ANY problems with them--they are the kindest thing you can do to your Saab transmission.  It is also a very good idea to get off your duff and check the oil level in them about once a month. [I offer a dip stick OR an oil check petcock  for this purpose. Either will simplify checking the oil level and make it quicker, easier and less messy than unscrewing the check plug to see if oil will run out on floor].
Here are two of the transmission case pieces--post hot tank--ready for reassembly.
I STILL don't know what that CRAP was in this particular transmission....

Thursday, October 2, 2014

SAAB CLUTCH RELEASE ARM RECONDITIONING

 Time to recondition some more clutch release arms. These get worn in the area where the release bearing is held--[see fat arrow at the TOP drawing, above], and in the loop at the outer end and in the clevis pin itself. I weld up the wear areas and machine them back out to fit the new release bearing.  NOTE: Currently there are TWO styles of release bearing available, and the mount "pins" on them are different diameters. The release bearings shown in the photo below are the OLD style, with larger diameter pins. 
 The old release arms are usually pretty grubby when I receive them. Compare an old one [right] to one of my reconditioned arm assemblies [at left]. What you can't see in the photo is how much slop was in all the joints and how bad the release bearing was.
I prefer to recondition a batch of these critters at one time. I did eight of 'em this go-around. If you look carefully you can see early and late release arms. The three on the left [top row] and one on the left [bottom row] are LATE arms. The rest are EARLY arms. There is no difference, functionally. Just a running change that Saab made at some point in the production of these parts, and not at all unusual for a car company.

Wednesday, April 3, 2013

SAAB V4 RELEASE BEARING ARM REBUILD

 SAAB V4 clutch problems are very often made worse by a worn clutch release arm. The drawing above shows the location of the release arm in the transmission bell housing, then [above and left] the release arm itself, and finally, above that, the fat arrow shows how the release arm gets worn where it holds the release bearing peg. These release arms are, of course, no longer available new, so the solution is to rebuild the arm by partially welding up the hole at the top and the "C" cup at the bottom, then machining them both out to fit the new release bearing.
 This nasty bugger is how most of 'em look when I get 'em. It's hard to see in this photo but the welding has been done. I have a special jig I use to get the hole and the cup machined back out to the correct size and location [relative to the center line of the
main "pipe" [on the left]. The clevis [top] and its pivot pin also get badly worn.
I drill out the clevis rod [top] and the holes in the loop of the arm and use an oversize pin to eliminate the slop in that part of the arm. This is the reconditioned release arm, with all the related parts, including the new release bearing and retaining clips. Good as new and a lot prettier...heh heh heh. 

Saturday, March 23, 2013

SAAB V4 TRANSMISSION TROUBLE

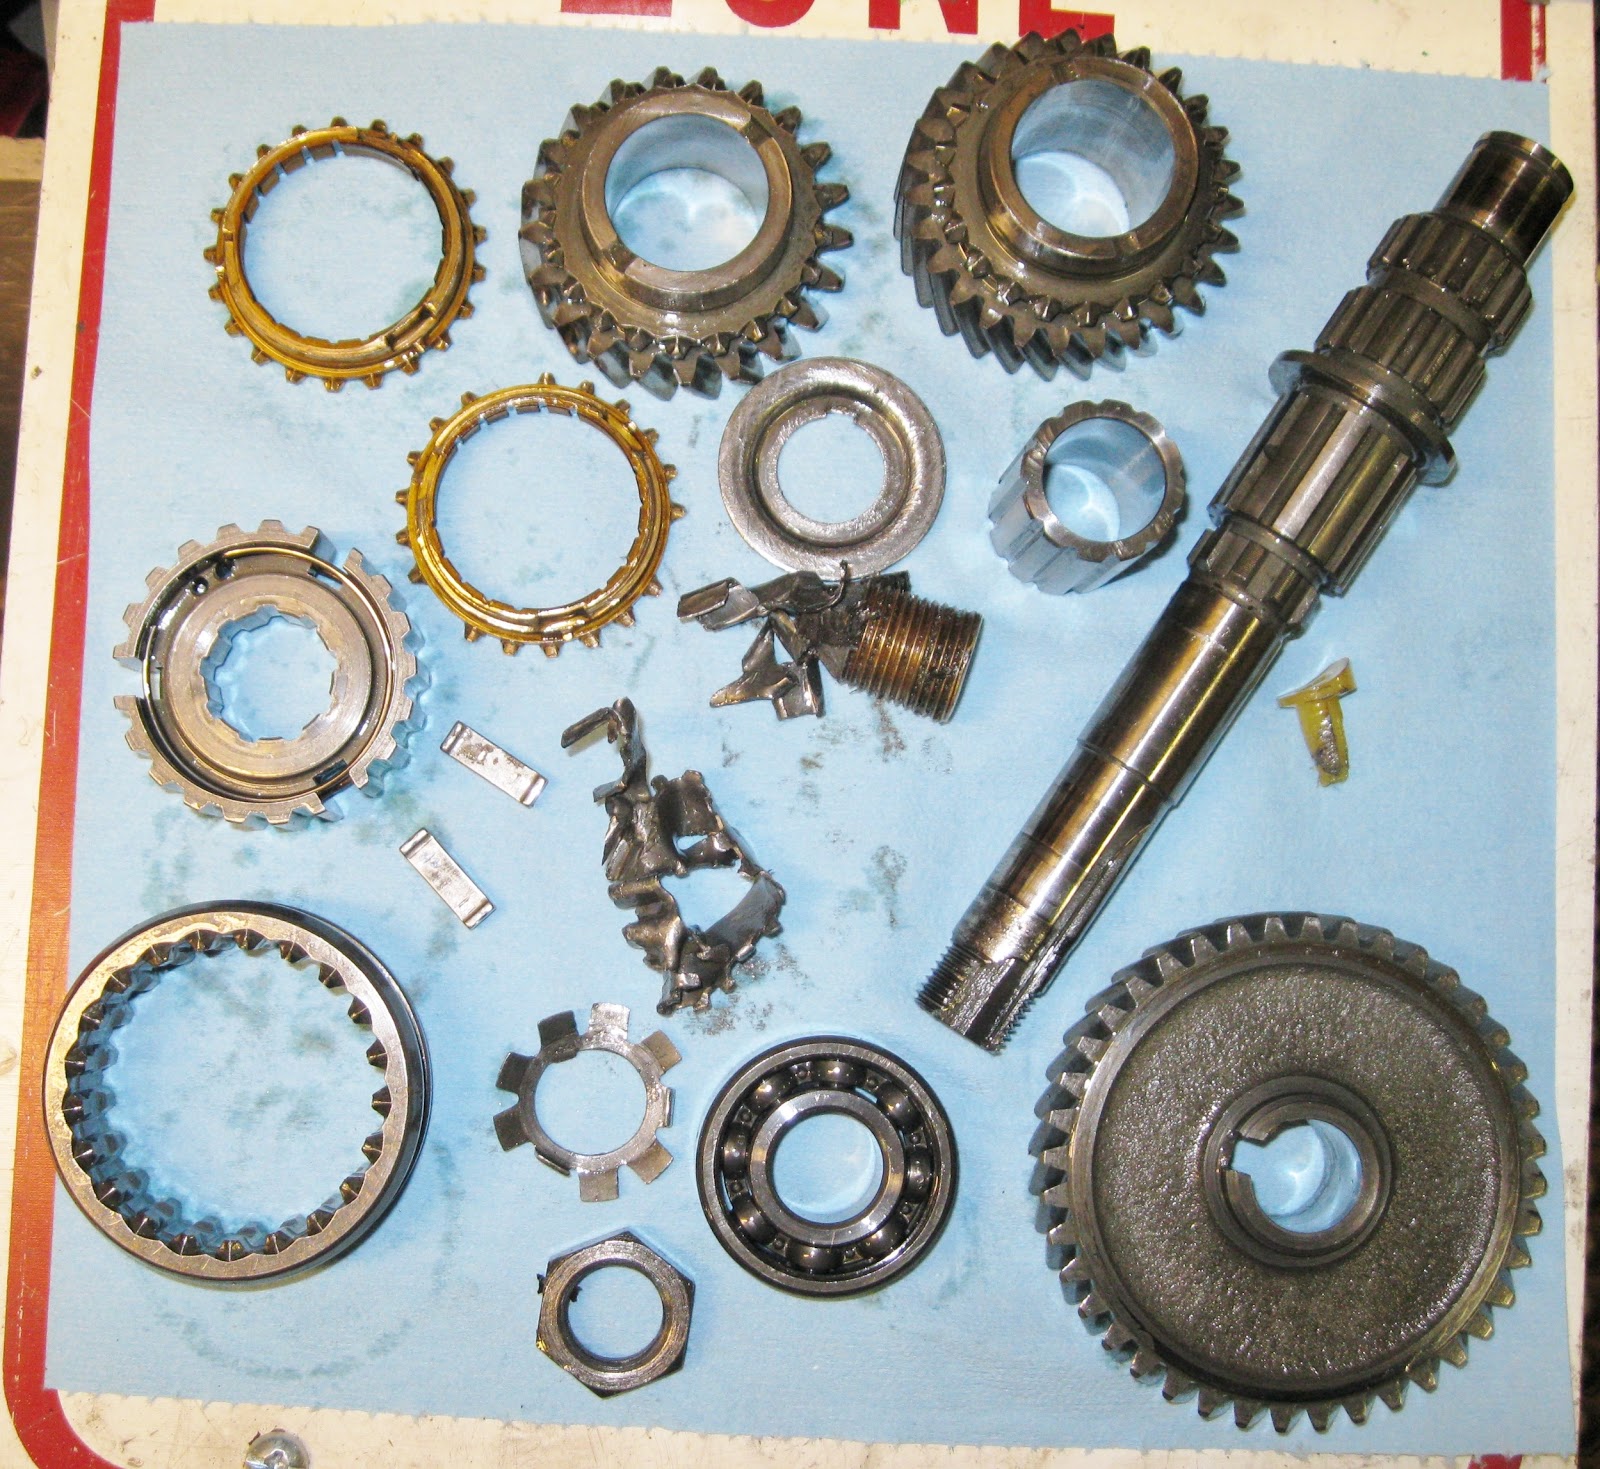
 These are a few of the buggered up transmission parts that I found in the bottom of a transmission I just rebuilt for a customer. This was strange because I usually don't find this sort of damage. It was also strange because the transmission was CLEAN inside. Clearly, someone had been into it recently and had screwed up the job. Also--parts were missing and every case bolt was WAY too tight, as if it had been put together using an impact wrench, which is NOT a good idea. ALL the bolts/nuts in these Saab transaxles must be torqued to the specs provided by Saab in their factory service manual.
 Once I had the bell housing off, it was clear what had happened. The nut at the end of the countershaft [shown] had come loose. The shaft then "floated" and the result was that every part shown--3 gears, the shaft, low and second synchronizer rings, the synchronizer hub and a bunch of smaller parts--were all busted up and had to be replaced.  All because the moron who was into the transmission last did not correctly torque the nut at the end of the countershaft.  OY!
 Well, here is the reassembled gearbox. All countershaft-related damaged parts--as well as others damaged because of the countershaft problem--have been replaced. Note that the 'box is in my factory transmission jig. Using this jig--and the 20-odd factory tools that go with it--is the ONLY way to be sure that an overhaul of one of these transaxles is done correctly.
 There are a number of internal adjustments that MUST be done correctly--some with correct thickness shims, some with feeler gauges, and this one with a dial indicator set up--to insure long life and reliability of the transaxle.
 Here is the finished transaxle. I always specify the use of synthetic transmission oil--AMSOIL being the BEST, in my opinion--so I use an anerobic sealer, which is not attacked by synthetic oils--for all case mating surfaces, and on both sides of the rear cover and top cover gaskets.
Another view of the completed transaxle. Note that there is NO freewheel control lever. This unit has been "neutered" so the freewheel--a carry-over from two-stroke engine days--does not function.  It is very easy for the V4 engine--which actualy has TORQUE [compared to the two stroke] to damage the freewheel unit. It is worth noting that I DO NOT weld internal parts to neuter the freewheel! At any time in the future, the freewheel system COULD--if the owner got soft in the head--be put back into use.

Sunday, March 10, 2013

SAAB V4 CYLINDER HEAD PROBLEMS

 Call it "Murph'y Law" or BumLuck or any other saying regarding mechanical difficulties, but recently I have encountered not one, but TWO problems with V4 Ford/Saab cylinder heads for high performance engines.

Take a look at my exploded view drawing above. Note the exhaust valve hard valve SEAT. Today's unleaded fuel will cause early exhaust valve failure without hardened exhaust valves and valve seats.  So far so good...

I install larger diameter valves and of course larger exhaust valve hard seats. I've rebuilt dozens of V4 engines with these big valve cylinder heads, with no problems. Still, so far so good.

A couple of weeks ago, my machinist found a "pocket"--a casting flaw--in a cylinder head, where he had machined the head to accept a larger diameter hard valve seat.  Result? the head was instant junk. Kauput.

This week, another bad cylinder head....
This head [shown above, before installation] was on an engine installed in a customer's Sonett III, and I discovered--during the 500 mile drive-off--that the right side exhaust pipe was putting out WHITE smoke. Not a lot at first, but it got worse as the end of the 500 miles approached, it was obvious that it was not going to get better. A compression check showed equal compression in all four cylinders and a vacuum gauge check showed steady--and correct--manifold vacuum for this elevation [1350 feet above sea level].

I retorque the cylinder heads and intake manifold to factory spec's 3 times during the 500 mile drive-off runs. The drive-off period allow correction of [usually] small glitches that always appear--in any number of areas--when a car has undergone a full restoration.

I removed the carburetor, intake manifold and right hand cylinder head. Close examination of the head and intake manifold gaskets showed no damage to either, but it was clear that there was a big problem in the forward [No. 1] combustion chamber. The exhaust valve was VERY white, indicating a lot of heat, and there was a bit of fluid around the intake valve. I had certainly found the area of the problem.

NOTE: White smoke in the exhaust means coolant is being sucked into the combustion chamber. Blue smoke means OIL is being sucked into the combustion chamber, either past the valve guides or past the piston rings, or both.  Black smoke means the engine carburetion is WAY too RICH.  Smoke of ANY kind from the exhaust means further investigation is needed, and soon.

The reason for the problem was a crack in the cylinder head at the intake valve seat, where apparently the machining of the head to accept a larger valve had either come close to another pocket in the head casting, or was simply because after machining, the wall thickness between the seat area and the water jacket was thin enough that it cracked with the heat of  combustion.  NOTE: both head were magnefluxed after machining and showed NO cracks.   

Well...shit happens. Particularly when you are trying to get a quart's worth of work out of, essentially, a pint pot. My modified V4 engines produce 115 to 140 horsepower, depending on how thick the customer's wallet is, but the more power you produce
the more possible are the unexpected results. Usually....everything is just fine and the customer gets a really nice engine that will be as reliable as a factory engine.

But sometimes...shit happens.  That's why we ALWAYS do a 500 mile drive-off before we deliver a restored Saab to it's owner, and why we insist that the owner of one of our reconditioned V4 engines follow the instructions we include with the engine when we ship it to him. 

Saturday, March 2, 2013

SAAB V4 ENGINE REBUILD--PART 4

 First--my apologies for less than wonderful photos. A BLACK engine is not the greatest for award-winning photography...This is the completed Ford/Saab V4 high performance engine, ready to go to the owner, to "wake up" a Saab 96. It will produce 110-115 horsepower--quite a step up from the original 73...
The car in the background is my '37 FIAT Topolino, "MR T".
 Front view. Note the timing cover--modified to give room for a radiator with electric fans. Behind the cover are special timing gears--steel gears for crankshaft and balance shaft, aluminum gear for the camshaft. The cam itself is a regrind to Iskenderian F4 specs. Atop the engine is a Weber 32/36 DGV-5A carburetor and air cleaner.
Right front corner.  The new oil filter and water pump are visible. Not visible--big valve cylinder heads and fully balanced crankshaft and associated parts.  I reconditioned and lightened the rocker arms as well. Note the engine lift [in red], an item I built 40+ years ago.  Good tools last a very long time...
Arse end. Note the reconditioned distributor and high performance Magnecore plug wires. Note also the light flywheel and matched pressure plate. The blue paint indicates the balance-match [pressure plate to flywheel] point. The bits of green tape seen here and there are to cover coolant pipes, etc, as the engine is to be shipped to it's owner in another state. I send along a compete listing of all the parts and all the work done on these engines [9 pages long on this one...] plus a short "manual" on doing the necessary re-torques and adjustments as the engine is driven in the owner's car.