This is the flip side of a Saab Monte Carlo instrument module, in all its beat up glory. Rust, corrosion, hard handling, and 50 years time have taken their toll. AK!
Here is the front of the plastic instrument mounting panel. It was pretty boogered up. You can't see all the cracks and gouges in the panel, in this photo, but they were there.
The panel had six mounting bolts cast into it--this is the back side--and five of them were ripped out. The panel was also warped and was cracked in about a dozen places.
J B Kwikweld to the rescue! A local hardware store was the source for the 4mm x .7mm bolts, as well as the brass pipe I used to provide the centering sleeves for each of the bolts. There were a number of places where I used the JB to straighten the panel by routing out a long groove, laying in the JB, then holding the panel flat as that brand of killer epoxy cured for 24 hours.
The front of the panel had eight or ten places where there were a lot of little side by side cracks. I ground out each tiny crack with a Dremmel tool, then filled it in with auto body filler and sanded it smooth. This sand-fill-sand-fill-sand process went on for a couple of days.... Then it was time to prime-sand-prime for a while, and finally give it three coats of color. Pretty good, huh?
Each of the instruments were reconditioned. Here is the full set, ready to install in the car.
And here are the four major instruments sitting in the repaired and repainted mounting panel. All the warning lights--not shown in this photo--were also reconditioned--they were just as grubby as the rest of the module [see photo one--above]. The owner could have just whacked out a panel out of aluminum and screwed it to the instrument panel of his Saab 96, but chose to have me do the job right...and you can see the results. Reminds me of a sign I saw one time on the shop of an old time welder/blacksmith: "I can mend anything but a broken heart."
Showing posts with label Speedometer Reconditioning. Show all posts
Thursday, May 5, 2016
Thursday, March 3, 2016
SAAB SPEEDOMETER--DUAL REGISTER INTO A STANDARD 2-STROKE
What we have here is a HYBRID speedometer. My customer wanted a dual register speedometer--as in a Monte Carlo--for use in his standard 1966 96 two stroke car. The trouble was that the Monte Carlo cars--either two-stroke or V4--had a transmission with a 4.88:1 final drive transmission. The '66 two-stroke had a transmission with a 5.43:1 final drive. So the MC speedometer would be WAY WRONG in both SPEED and MILEAGE recording......Hmmmmm.....
Clearly, the solution was to change the internal gearing of the MC speedometer [see first photo]. After some head-scratching, I did that gearing change, and the finished speedometer [above] reads correctly on the test bed, for a Saab with 5.43:1 gears.
Here is the flip side of the finished speedometer. I set the odometer miles to match the miles currently shown on the speedometer in the customer's car. The change-over can be done, but it is nice to prove that the change was done correctly, by running the finished speedometer on the test bed. Good stuff!
Clearly, the solution was to change the internal gearing of the MC speedometer [see first photo]. After some head-scratching, I did that gearing change, and the finished speedometer [above] reads correctly on the test bed, for a Saab with 5.43:1 gears.
Here is the flip side of the finished speedometer. I set the odometer miles to match the miles currently shown on the speedometer in the customer's car. The change-over can be done, but it is nice to prove that the change was done correctly, by running the finished speedometer on the test bed. Good stuff!
Sunday, October 18, 2015
SAAB 95 & 96 WIPER MOTORS WIPE AGAIN!
Wiper motors again! This ugly duckling is a Lucas motor for a late SAAB 95 or 96. This one was in its fairly ugly, not working, state when I received it. Nasty....
Here is the same motor...DE-nastified, and ready to be reassembled and tested.
Ah, Henry Ford would be proud of me....three of 'em reconditioned and ready for reassembly.
...and here they are, ready to do their duty happily in a vintage SAAB 95 or 96. All have been tested for both speeds, plus self park. Neat, aye?
Here is the same motor...DE-nastified, and ready to be reassembled and tested.
Ah, Henry Ford would be proud of me....three of 'em reconditioned and ready for reassembly.
...and here they are, ready to do their duty happily in a vintage SAAB 95 or 96. All have been tested for both speeds, plus self park. Neat, aye?
SAAB 99 SPEEDOMETER RECONDITIONING
SAAB speedometer reconditioning time again, but this time a SAAB 99 EMS speedo!
These units are full of plastic gears [typical of bean counter work at VDO, I assume] and in the top photo you can see the END of one [of 2] bad plastic gears in this speedo. It is the white gear between the two spiral gears.
The top [main] register has a grey, toothed gear at the right end --it is mostly lead and is pressed onto the register shaft. After umpteen years of work, it loses its grip
--literally--and the odometer stops odometering. I replace that gear--using a number of very special puller and pusher and holder tools--with a gear made of some modern, miracle plastic that is tough and won't slip on the shaft.
This photo shows the bad [cracked and slipping] small, white gear, the main register shaft, and just inside the speedometer frame, the bad [also slipping] part lead drive gear. I replaced both gears, lubed the unit, set the odometer to the figure the customer wanted, then reassembled it and calibrated the speed. Every speedometer has a specific gear ratio. The master VDO book [which I have] shows speeds for the speed needle, given various input speeds [from the speedometer cable]. I use a calibrated input speed, and set the speed needle to agree with the VDO figure for that speedo's gear ratio. No guess work. We all like the speedometer to read right. This one is ready for another 87,000 miles....
These units are full of plastic gears [typical of bean counter work at VDO, I assume] and in the top photo you can see the END of one [of 2] bad plastic gears in this speedo. It is the white gear between the two spiral gears.
This is the speedometer out of the 78 EMS. All looks good here.
--literally--and the odometer stops odometering. I replace that gear--using a number of very special puller and pusher and holder tools--with a gear made of some modern, miracle plastic that is tough and won't slip on the shaft.
This photo shows the bad [cracked and slipping] small, white gear, the main register shaft, and just inside the speedometer frame, the bad [also slipping] part lead drive gear. I replaced both gears, lubed the unit, set the odometer to the figure the customer wanted, then reassembled it and calibrated the speed. Every speedometer has a specific gear ratio. The master VDO book [which I have] shows speeds for the speed needle, given various input speeds [from the speedometer cable]. I use a calibrated input speed, and set the speed needle to agree with the VDO figure for that speedo's gear ratio. No guess work. We all like the speedometer to read right. This one is ready for another 87,000 miles....
Friday, April 24, 2015
SAAB RIBBON SPEEDO MODULE--ELECTRIC TEMP GAUGE
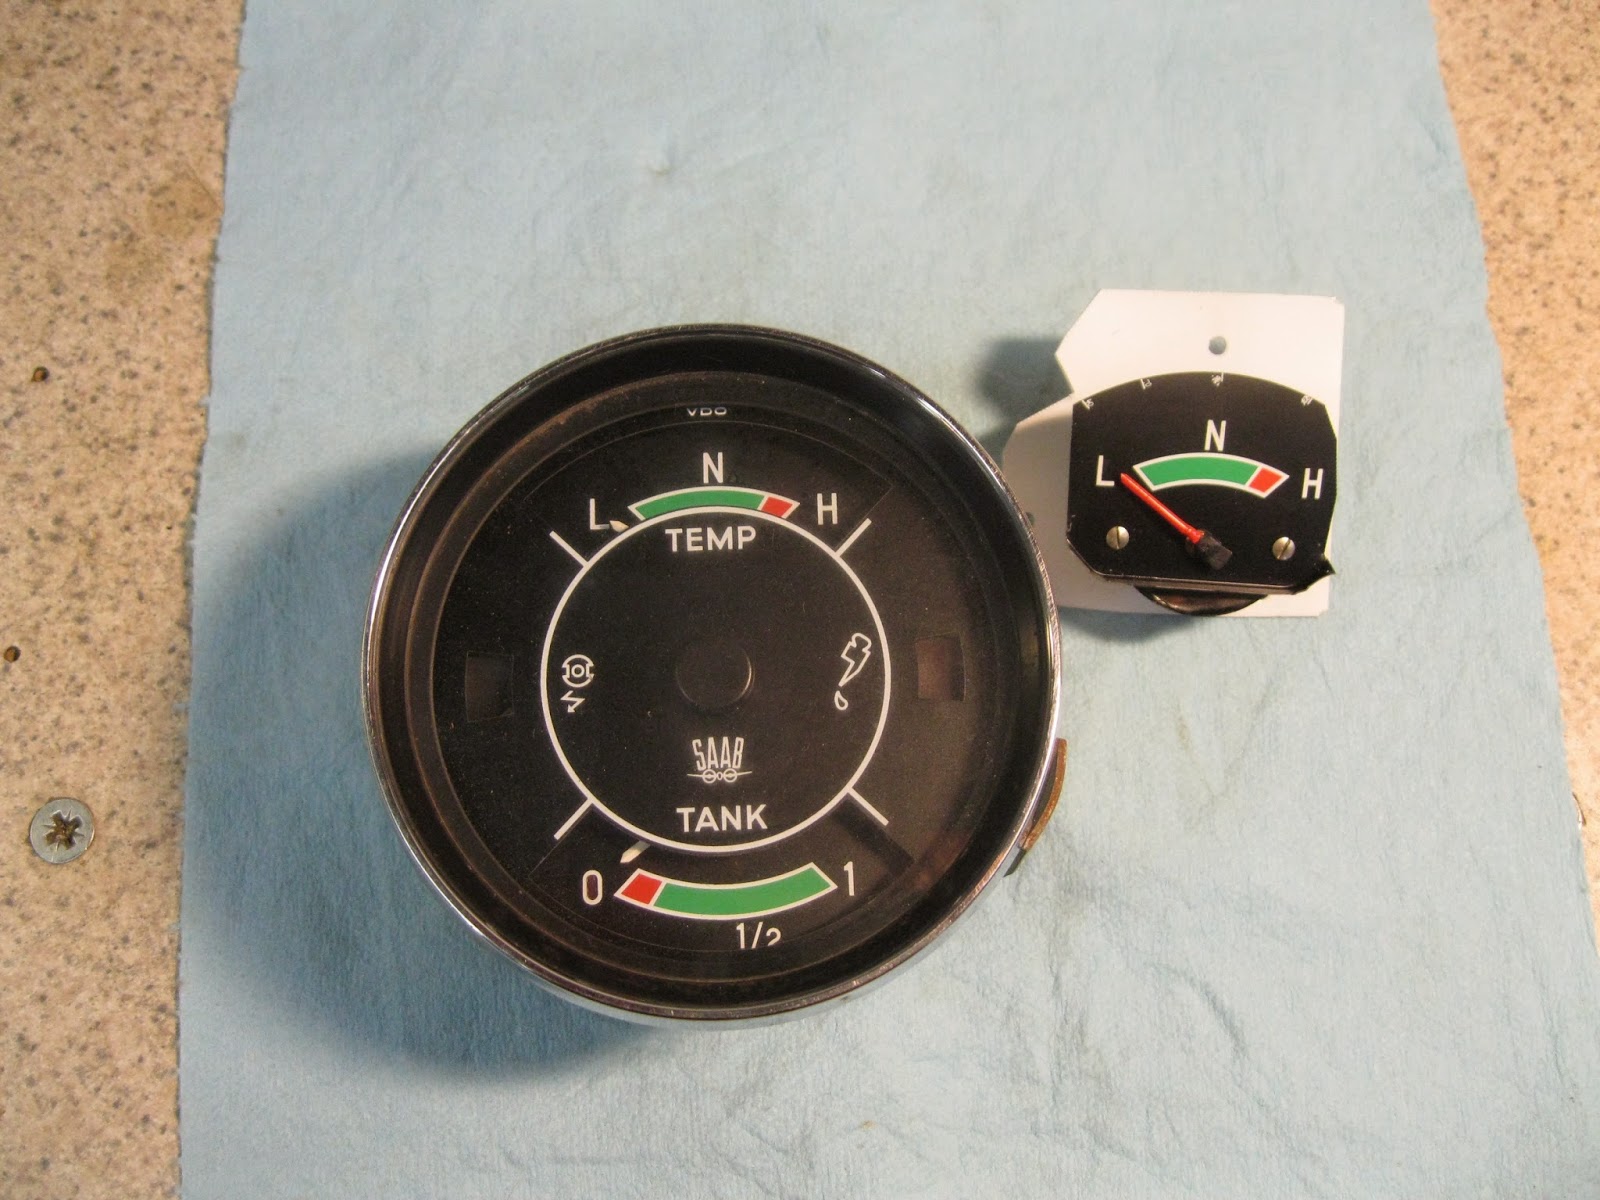
Here we have two ancient Saab 96 speedometer/multi-gauge units. Because the temperature gauge [left gauge in top module] is a so called "bulb" type, the capillary tube from the sender in the cylinder head to the gauge itself gets damaged and the gauge is kaput. NO new assemblies are available. The SOLUTION is to change to an electric gauge/sender unit combination. The PROBLEM is figuring out how to mount an electric gauge in the old module. Head scratching time....
My solution is to remove an electric temperature gauge from a Saab combination gauge unit. I trimmed the gauge face slightly and mounted it on an aluminum plate, as shown above. Making the gauge fit the mount plate and the mount plate fit the speedo module....let's just say that part took the most head scratching.
I always have to strip the main, cast aluminum case because it was painted white at the factory and the old white paint flakes off. You can see it is all cleaned and repainted here, and the mechanical bits are all lubricated correctly and yes, the odometer now works!
Go back to the first photo [bottom] to see how the electric gauge looks when it is installed. It is a good "fit" and a good "match" for the other original gauges. This photo shows the back of the module, with the electric gauge mounted. The tan wire is marked "tank", but that's my mistake--I changed it to correctly read "temp sender".
All electric gauges--except an ammeter and a voltmeter--need 3 electrical inputs: 12 volts for reference, an input from the sender unit, and ground. The latter is the black wire in the photo. So you see, the head scratching worked!
My solution is to remove an electric temperature gauge from a Saab combination gauge unit. I trimmed the gauge face slightly and mounted it on an aluminum plate, as shown above. Making the gauge fit the mount plate and the mount plate fit the speedo module....let's just say that part took the most head scratching.
Once you get one of these suckers apart, you have quite a few pieces. I've cleaned them all up here, and have repaired the inoperative odometer in this one, and it's ready to go back together. That's another the tricky part, as you might imagine...
Go back to the first photo [bottom] to see how the electric gauge looks when it is installed. It is a good "fit" and a good "match" for the other original gauges. This photo shows the back of the module, with the electric gauge mounted. The tan wire is marked "tank", but that's my mistake--I changed it to correctly read "temp sender".
All electric gauges--except an ammeter and a voltmeter--need 3 electrical inputs: 12 volts for reference, an input from the sender unit, and ground. The latter is the black wire in the photo. So you see, the head scratching worked!
Thursday, July 3, 2014
SAVING A RUSTY SAAB/VDO SPEEDOMETER
What you see is the familiar Monte Carlo or Saab Deluxe instrument panel. But wait! Take a closer look---this is from a VERY rusty car. In fact the steel instrument panel itself was rusted through in a number of places. I wanted to see what I could salvage from this mess....
The back of the panel didn't look so hot either. Almost all the bolts are rusted beyond any hope of unscrewing. In fact, the clamps for the speedometer and tach have been removed, and the retaining bolts broke off. THAT didn't bode well....
Rust never sleeps, as you can see. At this point I wasn't feeling good about this....
The speedometer case is toast. But...hold on! The "innards" don't look too bad...maybe SOMEthing can be salvaged here, yet....
Well, I'll be...! The innards look better than some I've seen that weren't rusted! The little tool is one [of 50 or more little speedo tools] that I've built. I use this one to operate the speedometer by hand. Turns out I was able to do a normal reconditioning of the speedometer--including replacing the odometer drive gear [which is normal]--and the sucker works like a champ!
My spares stash yielded a good outer housing that cleaned up nicely....
And even the chrome ring and the glass cleaned up just fine. So a word to the wise--don't throw away a Saab speedometer or tachometer just because it has a bit of rust on the outside. It's what's INSIDE that counts! And if you have one you don't want---I DO!
The back of the panel didn't look so hot either. Almost all the bolts are rusted beyond any hope of unscrewing. In fact, the clamps for the speedometer and tach have been removed, and the retaining bolts broke off. THAT didn't bode well....
Rust never sleeps, as you can see. At this point I wasn't feeling good about this....
The speedometer case is toast. But...hold on! The "innards" don't look too bad...maybe SOMEthing can be salvaged here, yet....
Well, I'll be...! The innards look better than some I've seen that weren't rusted! The little tool is one [of 50 or more little speedo tools] that I've built. I use this one to operate the speedometer by hand. Turns out I was able to do a normal reconditioning of the speedometer--including replacing the odometer drive gear [which is normal]--and the sucker works like a champ!
My spares stash yielded a good outer housing that cleaned up nicely....
And even the chrome ring and the glass cleaned up just fine. So a word to the wise--don't throw away a Saab speedometer or tachometer just because it has a bit of rust on the outside. It's what's INSIDE that counts! And if you have one you don't want---I DO!
Sunday, June 15, 2014
V W "PODS", CLOCK AND SPEEDOMETER [1950] RECONDITIONING
Ancient V W speedometers, clocks and their mount "pods" seem to find me no matter how good I hide. This shows how they look when I get them....UGH! Nasty! But I guess if I'd been sitting around in an old, musty 1950 V W all these years I'd look a lot worse! Time to make 'em look and work good....
V W did things differently in 1950...above is the flip side of the speedometer pod, and the photo shows the bakelite casting, with the bosses for the three switches and the four warning lights, plus some crusty 1950 wires....
AHA! All better now! New wires, even. This particular V W obviously had an accessory item of some sort taking power off the input connection [No. 30] of the ignition switch. The old, inline fuse holder was kaput so I installed a new one [the red fuse holder to the left of the speedometer pod]. They're ready to go back into the old VeeDub.
[Drumroll...] And here they are--almost as nice as when they were first installed in Der Beetle back in 1950. Cool, huh?
V W did things differently in 1950...above is the flip side of the speedometer pod, and the photo shows the bakelite casting, with the bosses for the three switches and the four warning lights, plus some crusty 1950 wires....
AHA! All better now! New wires, even. This particular V W obviously had an accessory item of some sort taking power off the input connection [No. 30] of the ignition switch. The old, inline fuse holder was kaput so I installed a new one [the red fuse holder to the left of the speedometer pod]. They're ready to go back into the old VeeDub.
[Drumroll...] And here they are--almost as nice as when they were first installed in Der Beetle back in 1950. Cool, huh?
Tuesday, January 7, 2014
VOLKSWAGEN VANAGON SPEEDOMETER REPAIR
This is a Volkswagen Vanagon speedometer--late version--all laid apart. The plates in red are two of about 40 special mounts and tools I've built for working on all manner of speedometers. On the left, the plastic main mount, and in its center, the magnetic drive for the speed needle. UNDER the light color, round housing--barely visible--is the worm drive gear for the odometer portion of the unit.
At the top, orange colored, is the printed circuitry for counting off the miles driven so a warning light can come on urging the Vanagon owner to boogie to a V W dealership and spend a lot of money to have a tech push a reset button and turn off the warning light. This B.S. was done in the name of lowered emissions. Dealerships loved it. The owners? Not so much.
To the right, the dual register odometer assembly with its plastic framework. Previous Vanagon speedos had an aluminum framework, so you see the result of company bean counters at work. Look at the BOTTOM, main, register. On the right end you see a white gear. On the left is a much smaller, yellowed gear. Both are plastic and both tend--with age and jillions of miles of use--to get tired and release their press-on fit with the register shaft. Result? No odometer activity, though the speed reading may still work OK.
The FIX is to replace the larger gear, and in this photo the white gear is a new one that I just installed. Additional FIX is to replace the small drive gear on the left, which I have also done in this photo. The "innards" are ready to be carefully lubricated with modern temperature stable, non-hardening lubricants and reassembled.
According to ancient V W Service Bulletins, these late model Vanagon speedos can get noisy. The problem is that the wee bushing holding the speed needle shaft [see the center of the round housing in the main mount, in the photos above] gets worn badly, as the miles build up. This lets the magnetic "can" below the bushing to move around, touching the outer housing, and causing a noise that drives m'lady bananas. I have a FIX for this, too, but this particular speedometer didn't need it.
M'lady can drive this one a couple hundred thousand more miles before it drives her bananas.
At the top, orange colored, is the printed circuitry for counting off the miles driven so a warning light can come on urging the Vanagon owner to boogie to a V W dealership and spend a lot of money to have a tech push a reset button and turn off the warning light. This B.S. was done in the name of lowered emissions. Dealerships loved it. The owners? Not so much.
To the right, the dual register odometer assembly with its plastic framework. Previous Vanagon speedos had an aluminum framework, so you see the result of company bean counters at work. Look at the BOTTOM, main, register. On the right end you see a white gear. On the left is a much smaller, yellowed gear. Both are plastic and both tend--with age and jillions of miles of use--to get tired and release their press-on fit with the register shaft. Result? No odometer activity, though the speed reading may still work OK.
The FIX is to replace the larger gear, and in this photo the white gear is a new one that I just installed. Additional FIX is to replace the small drive gear on the left, which I have also done in this photo. The "innards" are ready to be carefully lubricated with modern temperature stable, non-hardening lubricants and reassembled.
According to ancient V W Service Bulletins, these late model Vanagon speedos can get noisy. The problem is that the wee bushing holding the speed needle shaft [see the center of the round housing in the main mount, in the photos above] gets worn badly, as the miles build up. This lets the magnetic "can" below the bushing to move around, touching the outer housing, and causing a noise that drives m'lady bananas. I have a FIX for this, too, but this particular speedometer didn't need it.
M'lady can drive this one a couple hundred thousand more miles before it drives her bananas.
Tuesday, November 26, 2013
SPEEDOMETER RECONDITIONING--MERCEDES-BENZ
This is the flip side of the instrument module. Clearly, a whole lotta screws have to come out to get to just the speedometer.
Here the speedometer is out of the module. If the speedometer was all that needed attention, that's as far as I'd have to go. But life ain't that simple. This critter was dirty and dusty INSIDE the plastic face plate, so it all had to come apart. In addition to the photos, I made a couple of pages of illustrated notes so I had some chance of getting it all back together on the first pass.....
Here is the bugger all apart. A lot of cleaning was necessary on ALL the internal parts of the module, and then I reconditioned the speedometer itself [lower left in the photo above].
So, after a lot of cleaning, wiping, dusting and polishing--along with liberal amounts of questioning the ancestry of the designer of this conglomeration of parts--it's done, pretty and ready to go get dusty and grimy once again in a drop top Merc. And...the odo now odo's---HA!
Sunday, November 17, 2013
STEWART-WARNER SPEEDOMETER RECONDITIONING--PETERBUILT
BIG RIGS have speedometers, too! This one is out of an 18-wheel Peterbuilt logging truck. It came to me dead as a hammer, with over 500,000 miles on the odometer. 500,000---that's not a misprint. Even Stewart-Warner speedos get tired, and it took parts from two old, dead ones to nurse this one back to health. The outer rings and the glass are on the left, the outer housing at the top, and the speedo internals plus the face and speed needle on the right. I built the holding fixture [in red], a necessary thing when I'm working on the delicate "innards" of a speedometer. Even one from a Peterbuilt....
A different view. The lower inner ring still needs to be painted in this picture, but everything else has been thoroughly cleaned---some parts in the ultrasonic cleaner---and are ready for reassembly. The special Phillips screwdriver at the bottom is yet another special tool I built. Handy little bugger.
One down, one to go... On the left, the reconditioned and calibrated speedo, ready to get back to work in a big ass logging truck. On the right, all the parts of another Stewart-Warner speedo for a Peterbuilt. Note that the speed faces are different. I ASSUME that the face on the right indicates a later version, as it has speed ranges in both MPH and Km/h. Except for the case, the parts on the right are ready for assembly and calibration. See, I can have fun with TRUK parts, too---HA!
A different view. The lower inner ring still needs to be painted in this picture, but everything else has been thoroughly cleaned---some parts in the ultrasonic cleaner---and are ready for reassembly. The special Phillips screwdriver at the bottom is yet another special tool I built. Handy little bugger.
One down, one to go... On the left, the reconditioned and calibrated speedo, ready to get back to work in a big ass logging truck. On the right, all the parts of another Stewart-Warner speedo for a Peterbuilt. Note that the speed faces are different. I ASSUME that the face on the right indicates a later version, as it has speed ranges in both MPH and Km/h. Except for the case, the parts on the right are ready for assembly and calibration. See, I can have fun with TRUK parts, too---HA!
Subscribe to:
Posts (Atom)