skip to main |
skip to sidebar
MR T once again--my '37 FIAT EuroRod. Time--finally--for an exhaust system. In the top photo your can see the tuned header system on the 2-litre FIAT twin cam engine. The white tank to the right is the expansion tank for the aluminum Saab 900 Turbo radiator. The diagonal bar across the engine bay ties the roll cage into the front spring tower. Visible, just ahead of the door is the slot for the right side semaphore, and ahead of that the right vent door for the cabin area.

There is FAR too much STUFF--fuel tank, Panhard rod, suspension trailing arms, and a box on each side behind the seats for A--the electric fuel pump, filter and pressure control, and B--the Optima battery, as well as the standard FIAT 124 rear brake hydraulic pressure control unit--for the exhaust system to run under the car, back of the rear axle. So it must exit the car just ahead of the right rear fender. The photo above shows the system, ready to install under the car. Note the notch in the body of the car [extreme top left in the photo] for pipe clearance.
Tip your head to the right and this photo makes sense. I had to notch one body mount channel piece to clear the pipe at the front, and cut another notch in the body itself at the rear for the pipe back there. The bolt-together flange to the header is on the right.
MR T is now "exhausted." Yup, those are "suicide" doors. The whole hood and front fender assembly tilts forward [see top photo], and the each rear fender comes off after two Allen head bolts are removed and one electrical connector detached. I will add a Coke bottle shaped valence under the door that will disguise the exhaust pipe. The removable roof section, the hood/front fenders ass'y, the rear fenders and the spare tire cover are ALL new fiberglass parts that I laid up, and the lower side valences will also be made of that "wonder" material. [Some folks wonder how they made such a mess using the stuff--HA!]
The rear license plate shroud is ready to be mounted on the car. This shows the license lights mounted, though I removed them for the bonding-in process. There is a stainless steel strip [with nuts welded to its back side] riveted to the light strip to receive the light mount bolts.
AHA! The shroud is bonded in place on the spare tire cover of MR T. Final sanding and trimming is yet to be done.
This is a good photo of the arse end of MR T. You can see a LOT of my fiberglass work, including the removable top, the rear fenders [with Triumph TR4 tail lamps], the fiberglass fuel tank filler door, the fiberglass bumper valence [bumpers not yet laid up], and the fiberglass spare tire cover, now with the license plate shroud bonded in place.
A good rear view showing the 'glass parts. If you look carefully at the top area of the fiberglass top, you can see the "double bubble" I built into the top. If you look closely at the center of the bumper valence you will see a small square hole cut in the valence surface. Just inside the hole is a trailer hitch receiver. Just ahead of the right tail lamp assembly [sort of in the middle of the white bondo area] is the connector plug for the trailer lights wiring. It's called "plan ahead".....
A low angle shot of the license plate shroud, showing the lights as well as the license plate location. The dark areas on the spare tire cover are where I added a ply of graphite cloth for extra strength.
The spare tire cover is hinged on the left and swings open as shown to remove the spare tire. You can see the wiring [with a disconnect plug] for the license lights and the cover prop. I used plug connectors throughout the car as I wired it. So far there are 68 plug connectors.....
I might have mentioned that I like working with fiberglass. Well, I also like working with auto electrical wiring. Heh heh heh....
FIBERGLASS TIME! I really LIKE working with fiberglass!These are carved and sanded urethane foam blocks, the basis for a rear license plate shroud for MR T, my '37 FIAT Topolino "EuroRod". Also shown are multiple layers of 8-ounce bi-directional cloth. The foam blocks are stuck together with small dabs of "bondo", which I also used to stick the blocks down on an aluminum sheet that was covered with clear shipping tape.
The layup is complete. The thin strip to the left is for a mount panel for the license plate lamps. I added a license plate to show the scale of the layups, which are ready to be trimmed. The dark areas of the layup show where I added a ply of graphite cloth, for extra strength.
I used an air driven die grinder and cutter wheel [yes, I used eye protection] to cut the cured fiberglass. I used Fiberglast 2000 epoxy resin so the finished product is HARD, folks.
Here are the finished, trimmed pieces, ready to be assembled.
This photo shows all the parts, with a South Dakota license plate for scale. The small strip is yet to be trimmed and fitted to the lamps, then bonded to the shroud. I use small dabs of "bondo" [catalyzed "hot"] to hold the light strip in place, then add narrow strips of cloth, with epoxy resin, to bond the strip into place.
Did I mention that I really like playing with fiberglass?
Next time: Bonding the shroud assembly to the spare tire cover of MR T.
Time for more fiberglass fun on MR T, my 1937 FIAT Topolino Cabrio....In this photo I have the back fenders mounted [and each held in place by two bolts] and the valence between the fenders at bumper level in place. Now it's time to build the spare tire cover. If you look closely you can see a fiberglass ring around the spare tire, right at the body surface. I laid up the ring first to get a nice "fit" to the body of the car, which is really a compound curve in that area.
I attached a 0.375" center pin to a mounting structure that will hold the pin exactly centered and vertical. You can see the mounting structure attached to the ring. The shaped board [light color, top right] can spin around and will cut the foam [see next photos] to get an even shape for the spare tire cover.
I used urethane foam [of the type used in constructing composite aircraft] to make the basic form of the cover. Here the foam--mounted to the ring--is ready for carving to the final shape of the cover. [You can see MR T behind the table].
There is always some rough--but careful--cutting to be done before the spin cutter is used. That's what I'm doing in this photo, using a "Sureform" rough file for the job. The action here is to rough file a pit, then check it with the spin, which you can see mounted to the center pin in the photo above. The spin arm makes the final, fine cut of the foam.
The foam shape is done. The check template shows a good "fit", all around what is essentially a male mould for the cover. Time to lay on fiberglass cloth now.
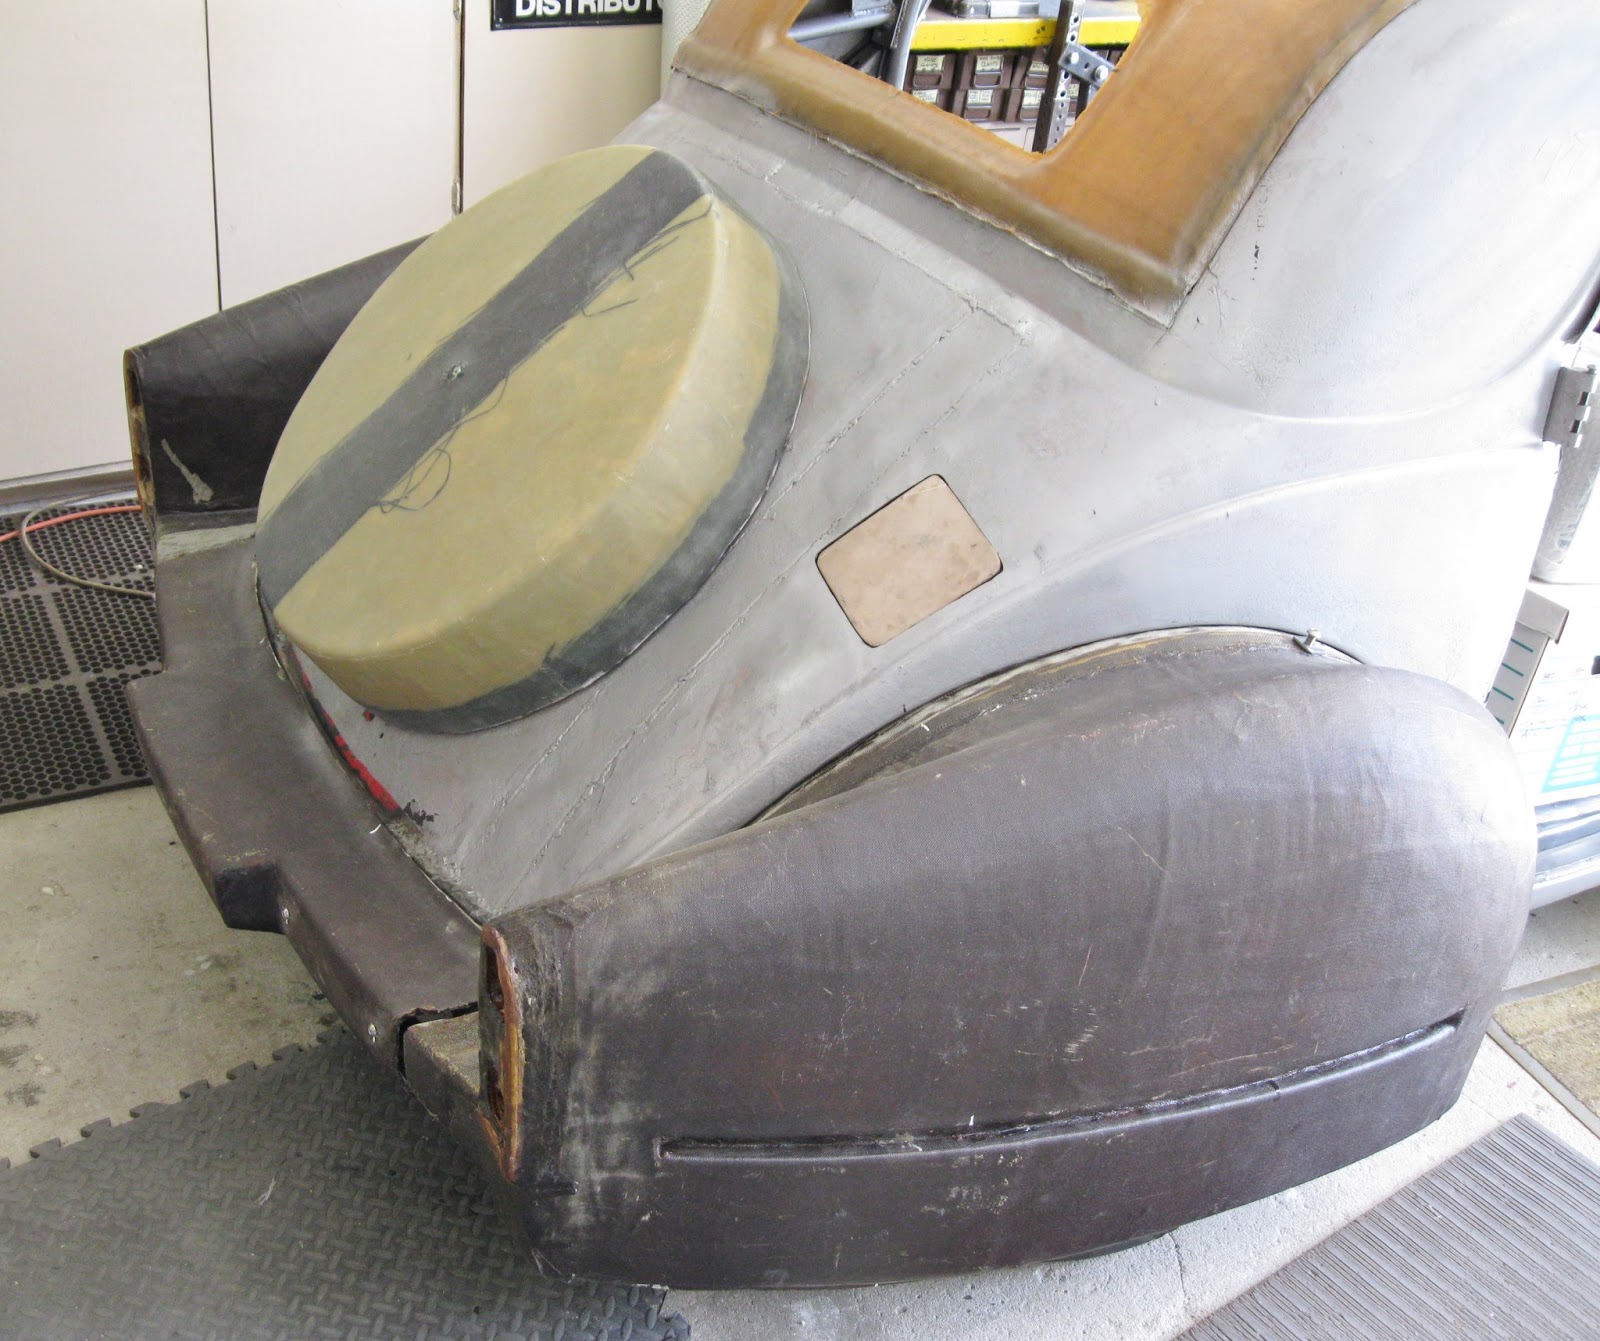
AHA! It's laid up! I laid on seven plies of aircraft bi-directional cloth, directly to the foam mould. Five plies are of 8-ounce cloth, the final two plies are 4-ounce cloth. The dark band is of 8-ounce bi-directional GRAPHITE cloth, to give extra strength on one side for the hinge, and opposite, the latch. You can see a band of graphite around the base, at the junction of the new cloth and the original 'glass ring. I give the lay-up a minimum of 24 hours to complete the cure of the aircraft epoxy that I used. I used NO polyester resin on ANY part I made up for this car. Epoxy resin makes a lay-up at least twice as strong compared to using polyester resin. Two further benefits: This particular epoxy has almost no odor, and the working time is easily 20 minutes.

The new cover is cured, trimmed and setting in place on MR T. The fun stuff now is to mount the hinge [which will be centered on the LEFT] and build and install the latch mechanism [which will be centered on the RIGHT]. More on that in further adventures with MR T....